I stopped checking bags when I realized one thing: airlines make billions from people who pack their fears. The “what if” outfits, the backup shoes, the full-size toiletries. On a two-week trip, most of it never leaves the suitcase.
This guide is about something else. Not just “packing light,” but building a repeatable carry on only packing system that works for 10–14 days (or longer) without feeling sloppy or underdressed. We’ll walk through the decisions that actually matter and the gear that quietly makes one bag travel possible.
1. The First Decision: Backpack or Suitcase (and Why It Matters for Fees)
Before you think about outfits, decide what kind of carry-on you’re committing to. That choice affects how much you can bring, how your body feels at the end of the day, and how likely a gate agent is to slap a tag on your bag and send it to the hold.
Here’s the uncomfortable truth: most people start with the wrong bag. They buy a big, heavy suitcase, then try to force it into airline rules. Flip that. Start with the rules, then choose the bag.
- Know your limits first. Many major airlines use around 22 x 14 x 9 inches (56 x 35 x 22 cm) for carry-on luggage, but budget carriers can be smaller and often have strict weight limits. Always check your specific airline’s carry on size restrictions before you buy or pack. A few centimeters can be the difference between “free” and a surprise fee.
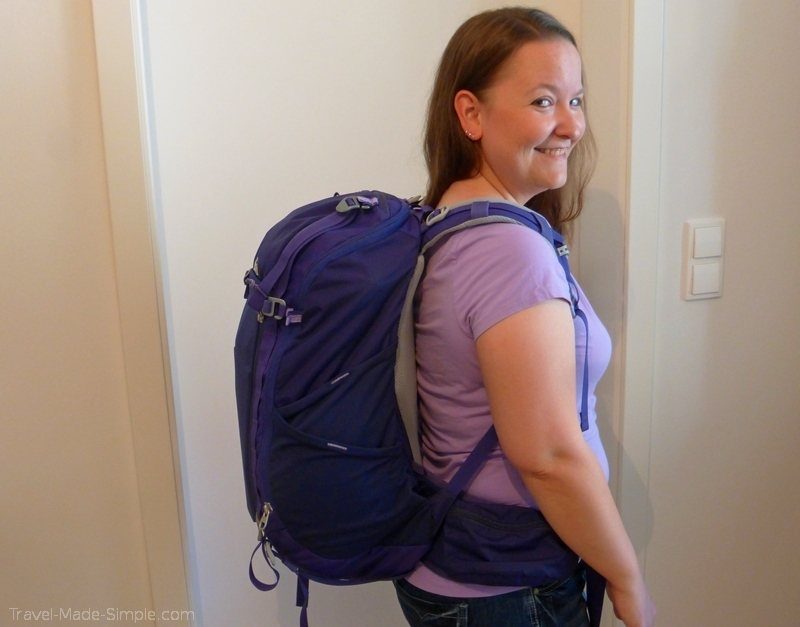
- Backpack sweet spot: ~35–40L. A travel backpack around 40L is usually the upper limit that still passes as carry-on on most airlines. Go smaller (25–30L) if you lean minimalist or plan to use a generous personal item.
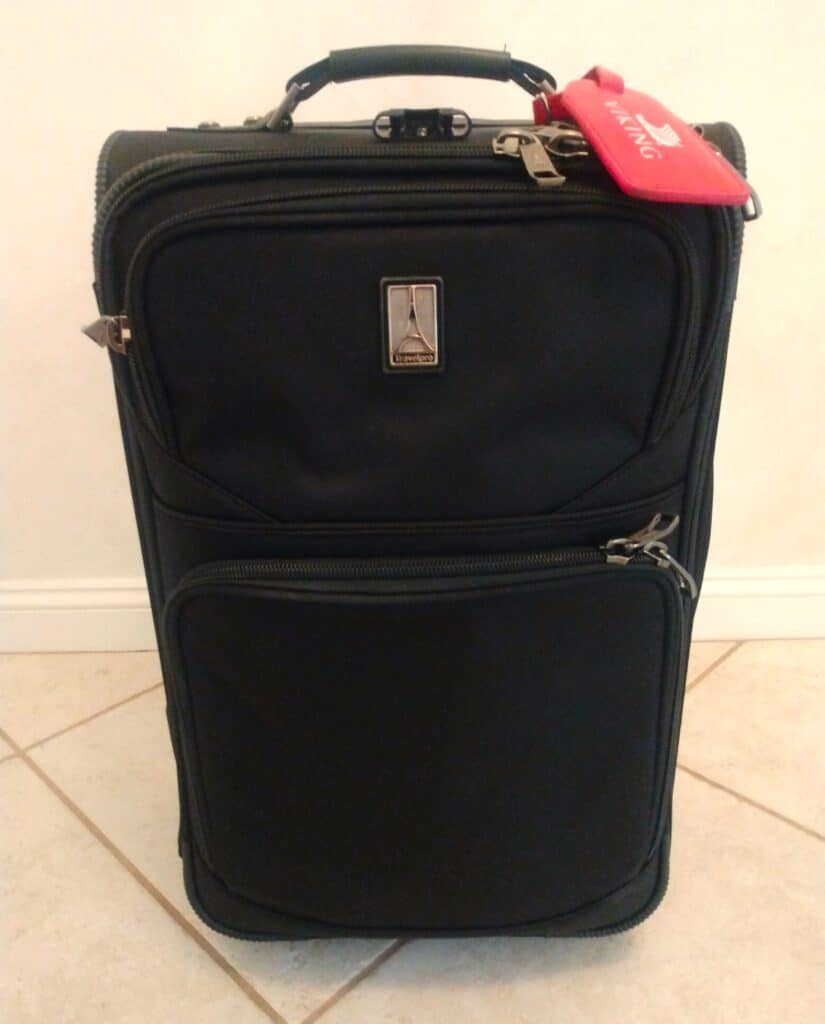
- Suitcase sweet spot: lightweight, not just stylish. A 22-inch hard-shell or soft-sided case that’s genuinely light (under ~7 lbs / 3.2 kg) gives you more weight allowance for your stuff, especially on airlines that weigh cabin bags.
If your trip is mostly trains and smooth sidewalks, a small spinner suitcase is easy and comfortable. If you’re facing cobblestones, stairs, ferries, and buses, a carry on backpack for one month travel or a 10–14 day trip will feel much more practical.
My rule stays the same either way: the bag must fit the airline, not your fantasy wardrobe. That’s how you avoid checked bag fees before you even start packing.
One more thing: your personal item is part of the system, not a random tote you grab at the last minute. A slim under-seat bag with a trolley sleeve (so it slides over your suitcase handle) is ideal. It carries your laptop, meds, valuables, and in-flight comfort items. If your “personal item” is a second big backpack, you’re more likely to get flagged and forced to gate-check something.
2. The Mindset Shift: From Outfits to Systems
Most overpacking starts with this question: “What do I want to wear?” For carry-on only international travel or long trips, that’s the wrong starting point. A better question is: What system of clothes will cover everything I’m actually doing?
Here’s how to reframe it:
- Start with reality, not vibes. Check the actual forecast for your exact dates, not just “Paris in spring.” Look at highs, lows, rain chances, and wind. A 65°F day with drizzle and wind feels nothing like a dry 65°F.
- List your real activities. Museums, hiking, client meetings, rooftop bars, long train rides, cooking classes. Your clothes should match terrain and use, not just Instagram photos.
- Identify your non-negotiables. Things that affect your health or ability to function: meds, CPAP, special pillow, compression socks, laptop for work, blue-light glasses. These go in the bag before extra sweaters or a third pair of jeans.
Once you know weather + activities + non-negotiables, you can build a capsule wardrobe instead of a pile of random outfits. That’s the core of any minimalist travel packing for long trips.
- Stick to neutral base colors (black, navy, gray, tan) with 1–2 accent colors.
- Every top should match every bottom. If it doesn’t, it stays home.
- Plan to wear each piece 3–4 times. If that feels uncomfortable, that’s a mindset issue, not a packing problem.
Try this filter: If I had to pay $20 to bring this item, would I still pack it?
That one question will shrink your carry on packing list for 2 weeks faster than any “hack.”
3. The Laundry Question: How Often Will You Wash?
This is the decision that quietly unlocks one bag travel for long trips. If you refuse to do laundry, you’re basically committing to checked luggage for anything over a week. If you’re willing to wash, even just once, everything changes.
For a 10–14 day trip, I assume I’ll do laundry every 5–7 days. That means I only need about a week’s worth of clothes, not two. The system looks like this:
- Underwear & socks: 5–7 pairs. Wash mid-trip. They’re small, but they add up.
- Tops: 4–6 total (mix of tees, blouses, or shirts). Quick-dry or merino pieces are ideal for carry on only international travel.
- Bottoms: 2–3 (for example, one pair of jeans, one lighter pant, one short or skirt depending on climate).
- Layers: 1–2 (a light sweater or fleece, plus a packable jacket or rain shell).
How you wash is flexible:
- Sink washing: Great for underwear, socks, and lightweight tops. Use a tiny bottle of concentrated detergent or even bar soap in a pinch.
- Laundromat or hotel machines: Plan one laundry block into your itinerary. It’s not wasted time; it’s a built-in break.
- Hotel or service laundry: More expensive, but sometimes worth it on work trips or tight schedules.
If you’re skeptical, test it at home: live for 10 days using only what you’d pack in a carry-on. Do laundry once. You’ll see quickly what you actually need versus what you like having “just in case.”
4. Shoes: The Hardest (and Most Important) Cut
Shoes are where most people blow their carry-on dreams. They’re bulky, heavy, and awkward to pack. The solution is simple and a little brutal: you get 2–3 pairs, total. One on your feet, 1–2 in your bag.
My typical 2-week setup:
- Pair 1 – Worn on the plane: Supportive sneakers that can handle long walking days. These are your workhorses.
- Pair 2 – Versatile everyday shoe: Often a clean white sneaker or low-profile shoe that works with jeans, dresses, and casual dinners.
- Pair 3 – Seasonal or special-use: Sandals for warm weather, ankle boots for cold, or a low heel if you truly need it for events.

To keep your one bag travel system honest, I use a few rules:
- If a shoe can’t handle at least a half-day of walking, it doesn’t come.
- If a shoe only works with one outfit, it doesn’t come.
- Flip-flops are for showers and beaches, not city walking. If you bring them, they’re a bonus, not one of your main pairs.
Remember: you’re not packing for your ideal life. You’re packing for the actual surfaces you’ll walk on (cobblestones, metro stairs, uneven sidewalks) and the real amount of time you’ll be on your feet.
5. Packing Tech: Cubes, Rolling, and Dead Space
Once you’ve trimmed your list, the next challenge is how to make it all fit without chaos. This is where a real carry on only packing system earns its keep.
My go-to setup:
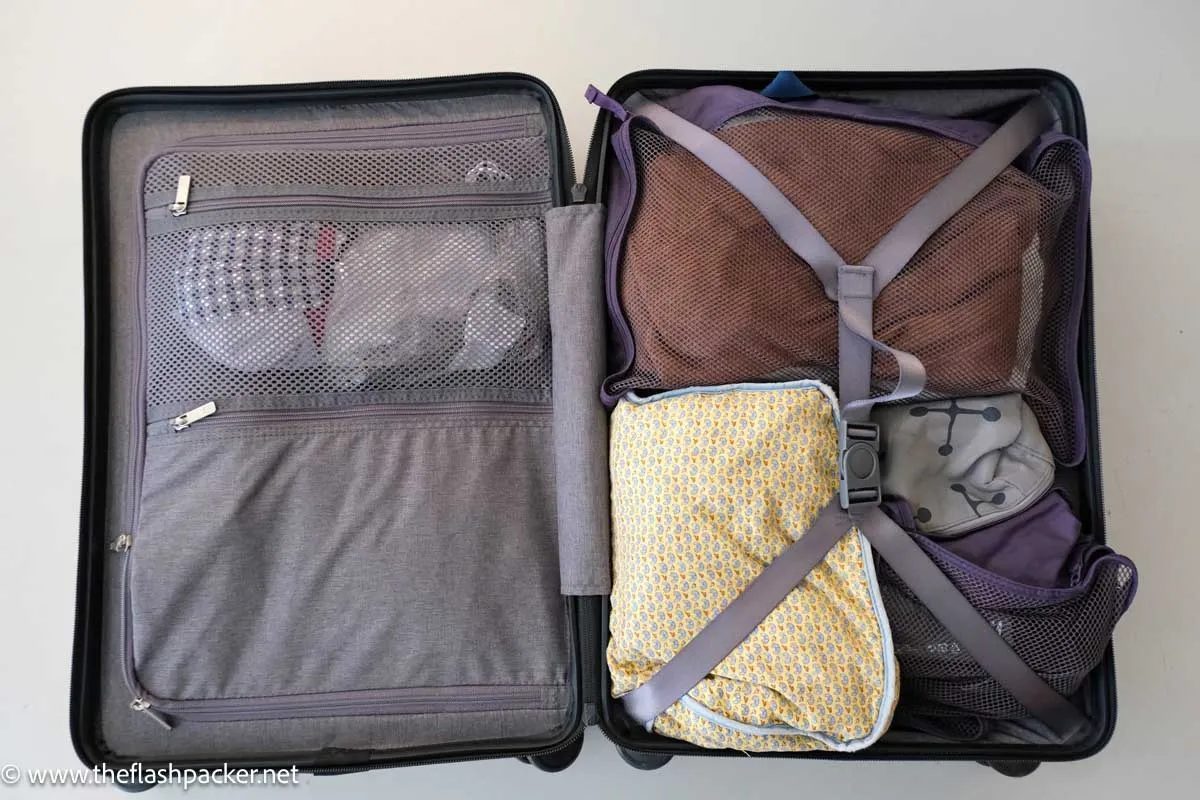
- Packing cubes: One for tops, one for bottoms, one small one for underwear/socks. Packing cubes for carry on suitcase organization don’t magically create space, but they compress and keep things sorted so you can actually find what you need.
- Rolling vs folding: I roll most clothes inside cubes. It reduces wrinkles and uses space more efficiently, especially in the corners.
- Use dead space: Stuff socks, underwear, or cables inside shoes. Fill gaps between cubes with soft items like a scarf or packable jacket.
For toiletries and electronics:
- Toiletries: Follow the 3.4oz/100ml rule and use a single quart-size bag. Decant your products into small containers or buy what you can at your destination. Simplify your routine; you don’t need your entire bathroom to avoid checked bag fees.
- Cables & chargers: Use a small tech pouch. Bring one multi-port charger and, if needed, a universal adapter. Skip duplicate chargers and extra gadgets if your phone can handle photos, reading, and entertainment.
Before you leave, do a quick stress test: pack everything, close the bag, then open it and try to find a specific item (like your rain jacket) in under 30 seconds. If you can’t, tweak your system until you can.
6. Personal Item Strategy: Your In-Flight Command Center
Most airlines allow a carry-on plus a personal item. Used well, that personal item is the difference between “tight but fine” and “this actually feels easy.” It’s also a big part of your personal item vs carry on bag strategy.
I treat my personal item as a mobile office + comfort kit, not overflow storage for clothes. It usually holds:
- Passport, wallet, phone, and travel documents
- Laptop or tablet (if needed), plus minimal cables
- Medications and any health non-negotiables
- Noise-cancelling headphones or earplugs, eye mask
- Refillable water bottle (empty through security), snacks
- One small extra layer (like a light sweater or scarf)

A few practical rules:
- It must fit under the seat. If it looks like a second carry-on, you’re inviting a gate check.
- Use a trolley sleeve. Being able to slide it over your suitcase handle saves your shoulders and makes tight connections less miserable.
- Don’t hide heavy stuff here. Some airlines weigh personal items too. Keep it reasonable.
If you’re traveling with kids, this becomes even more important. Their snacks, comfort items, and a change of clothes live here. But the rule still applies: no checked bag by default. You plan within the limits you have.
7. The Pre-Trip Edit: How to Remove 30% Without Regret
Even with a good system, your first draft packing list will be too big. Mine always is. The fix isn’t vague “packing lighter” intentions; it’s a deliberate edit that cuts the mistakes when traveling carry on only.
Here’s the process I use:
- Lay everything out. On a bed or floor, not directly into the bag. Seeing it all at once is confronting in a useful way.
- Group by category. Tops together, bottoms together, shoes together, “extras” together.
- Ask hard questions:
- Do I have two items that do the same job? Pick the better one.
- Is this for a very specific, unlikely scenario? If yes, it probably stays home.
- Would I pay a checked-bag fee just to bring this?
- Remove 20–30%. Literally pull items out until you’ve cut about a quarter. You’ll feel a bit nervous. That’s normal.
- Test pack. Put everything into your carry-on and personal item. Walk around your home or up and down stairs. If it feels heavy or annoying, cut more.
If you want to go one step further, do a trial run on a weekend trip with the exact setup you plan to use for a longer journey. You’ll quickly see what you never touched and what you wished you had. That’s how you refine your lightweight travel gear for carry on instead of guessing.
8. Putting It All Together: A Reusable Carry-On System
Once you’ve done this a couple of times, packing carry-on only stops being a heroic effort and becomes a template you tweak for each trip. The carry on vs checked luggage cost question becomes easy, because you already know you can travel with one bag.
In practice, my system looks like this:
- One airline-compliant carry-on (backpack or suitcase, depending on terrain and airline carry on size restrictions).
- One under-seat personal item with a trolley sleeve.
- Capsule wardrobe in neutrals + 1–2 accent colors, every top matching every bottom.
- 2–3 pairs of shoes, all walkable, one worn on the plane.
- Planned laundry every 5–7 days, so I only pack about a week’s worth of clothes.
- Packing cubes + tech pouch + quart-size toiletry bag to keep everything organized and compliant.
The payoff is huge: no checked-bag fees, no waiting at carousels, far less stress on tight connections, and a lot more freedom to move. You’re not wrestling a giant suitcase up metro stairs or across cobblestones. You’re just…walking.
If you want to go deeper into specific strategies, there are plenty of detailed breakdowns from frequent travelers who do this constantly, like Travel Made Simple and TripPlugin. But the core idea doesn’t really change:
Decide your limits first. Build a system that fits inside them. Then enjoy walking past the baggage carousel.