I don’t want my biggest travel story to be the time my card stopped working in a foreign ATM.
When you’re crossing several borders, your money setup matters as much as your flight itinerary. This travel banking setup checklist is how I actually plan my money for multi‑country trips: which cards I pack, how much cash I carry, and what backup plans I put in place so a blocked card doesn’t end the trip.
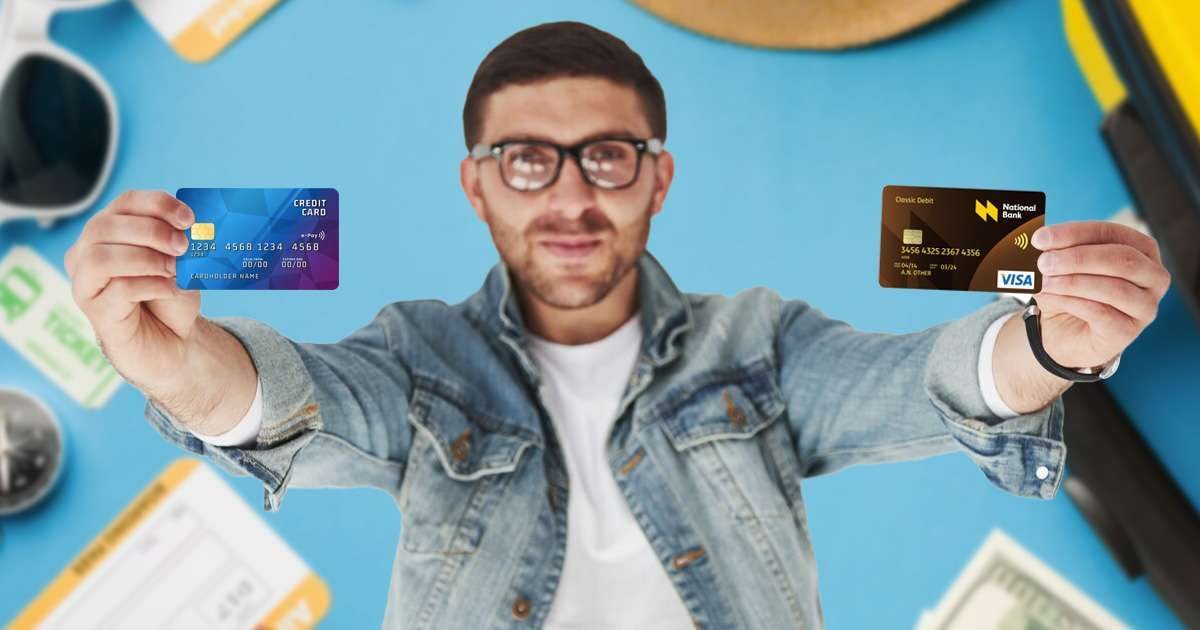
1. Decide your main payment method: credit, debit, or prepaid?
First decision: what will you use for 80–90% of your spending? For most travelers, that’s a no‑foreign‑transaction‑fee credit card, backed up by a travel‑friendly debit card. That’s my default too.
Here’s how I think about my multi country trip money plan:
- Credit card as default
I use a credit card for almost every purchase where cards are accepted. Why?
– Strong fraud protection and chargeback rights (most cards offerzero liability
).
– Better rewards on money I’d spend anyway: points, miles, cashback.
– Solid exchange rates, especially if there’s no foreign transaction fee. That 2–3% fee looks small, but over a long trip it quietly eats your budget. - Debit card for cash only
I treat my debit card as acash machine key
, not a daily spending card.
– It pulls directly from my bank account, so overspending is more obvious.
– It’s usually cheaper than a credit card cash advance for ATM withdrawals.
– Some accounts reimburse ATM withdrawal fees abroad or waive foreign ATM charges entirely. - Prepaid / forex card (if your country offers good ones)
In some places (like India), a forex card can be a big win: you preload foreign currency, lock in the rate, and often avoid foreign transaction fee costs and some ATM fees. On a multi‑country trip, a multi‑currency card can simplify things and protect you if your home currency weakens mid‑trip.
My rule of thumb: credit card for purchases, debit/forex card for cash, cash for edge cases. If you tend to overspend on credit, flip it: use debit for most purchases and keep a low‑limit credit card for emergencies, hotel holds, and bookings that require a card.
2. Build a resilient card stack (and test it before you fly)
On a multi‑country trip, one card is a single point of failure. A good travel banking setup has redundancy across banks, networks, and card types so one glitch doesn’t freeze your whole trip.
Here’s the card stack I aim for:
- At least two credit cards from different networks (e.g., Visa + Mastercard; Amex only as a third card). Some countries or small merchants simply don’t take Amex or Discover.
- At least two debit/ATM cards from different banks. If one bank’s fraud system panics and blocks you, you still have access to cash.
- One fee‑friendly account that reimburses or minimizes international travel card fees and foreign ATM charges. I keep only a limited balance there and top it up as needed for security.
Then I run a quick pre‑trip test:
- Make a small online purchase in foreign currency (if possible) to confirm the card works internationally.
- Check the PIN on every card. In some countries, chip‑and‑PIN is the norm, and signature‑only cards can be awkward at unattended kiosks, tolls, or train stations.
- Log into each bank’s app and confirm I can see transactions, change PINs, and freeze/unfreeze cards easily.
Last step: I write down (not just store on my phone) the emergency numbers for each bank and the last 4 digits of each card. If my phone dies or is stolen, I still have a way to call and cancel cards.
3. Plan your cash strategy: how much, which currency, and where to get it
Carrying a lot of cash feels safe until you lose it. I aim for just enough cash to be comfortable, not enough to be a liability. This is where the cash vs card when traveling question really matters.
My baseline for multi‑country trips:
- Local currency: 2–3 days of expenses
Enough for airport transport, food, tips, and small purchases. I don’t carry a week’s worth unless I know ATMs are scarce or unreliable. - Home‑currency emergency stash
Usually around $100–$200 equivalent in my home currency, hidden separately. I try not to exchange this unless I’m truly stuck, because airport and hotel exchange rates are often terrible. - Multiple countries = multiple small stashes
I don’t carry huge amounts of each currency. Instead, I withdraw modest amounts in each country and top up as needed. It keeps my travel budget for cards and cash flexible and safer.
Where I get cash:
- ATMs over exchange counters
ATMs usually beat currency exchange kiosks, especially airport counters with 5–8% markups. I still check the rate roughly so I know if I’m being fleeced. - Bank‑branded ATMs
I prefer machines attached to real banks during business hours. Less chance of skimmers, and if the machine eats my card, there’s a door I can knock on. - Decline “dynamic currency conversion” (DCC)
If the ATM or card terminal offers to charge me in my home currency instead of local currency, I say no. DCC almost always hides a bad rate and quietly increases your international travel banking costs.
After a withdrawal, I often make a small purchase to break large bills. Taxis, small shops, and street vendors may not have change, and no change
can quickly become an unofficial tip.
4. Stay legal: know cross‑border cash limits and declaration rules
There’s a difference between how much cash you can carry
and how much you can carry without paperwork.
Many countries let you bring in large sums, but require you to declare it once you cross a threshold, often around the equivalent of 10,000 in local currency or USD.
Typical patterns (always verify for your specific route):
- US & Canada: Declare amounts over about $10,000 (or CAD 10,000) when entering or leaving. In the US, that’s via FinCEN Form 105 plus the customs form.
- UK & EU: Around £10,000 / €10,000 triggers a declaration. Failure to declare can mean fines, confiscation, or worse.
- Australia & New Zealand: Similar 10,000 AUD/NZD thresholds with simple border forms.
- Asia examples: Japan requires declaration over 1 million yen; Singapore over 20,000 SGD; China has its own RMB and foreign‑currency rules.
Important nuance: carrying more than the limit isn’t usually illegal. Not declaring it is the problem. Authorities don’t accept I didn’t know
as an excuse.
My approach:
- I avoid carrying anywhere near these thresholds unless I have a very specific reason.
- If I must, I’m ready to declare it and explain the source and purpose. Receipts or bank withdrawal slips help.
- I remember that transit countries count. If I’m connecting through a country with strict rules, I check their limits too.
It’s one more reason to lean on cards and digital payments, keep physical cash modest, and avoid unnecessary stress at borders.
5. Map out fees and hidden costs before you go
Most people obsess over flight prices and then casually hand 3–8% of every purchase to banks and exchange kiosks. I’d rather keep that money for another trip. A simple travel banking setup checklist for fees can save a lot.
Here’s the fee checklist I run through for each card and account:
- Foreign transaction fee
Many cards charge around 2–3% on every foreign purchase. On a $3,000 trip, that’s $60–$90 gone. I prioritize at least one main card with 0% foreign transaction fees to keep foreign transaction fee costs down. - ATM fees
There can be three layers: the local ATM fee, my bank’s foreign ATM fee, and an FX markup. Some accounts reimburse ATM fees worldwide; those are gold for long trips. - Cash advance fees on credit cards
Withdrawing cash on a credit card is usually a bad deal: immediate interest, a cash advance fee, and sometimes a worse rate. I avoid this unless it’s a true emergency. - Prepaid/forex card load and withdrawal fees
Locking in a rate is great, but I still check: load fee, reload fee, inactivity fee, ATM fee, and card closure fee. I want the full picture before I rely on a travel debit card vs credit card or a prepaid option.
Then I do a quick back‑of‑the‑envelope calculation:
- Estimate total card spend (e.g., $3,000).
- Multiply by foreign transaction fee (e.g., 3% = $90).
- Add expected ATM withdrawals and fees.
Seeing that number in one place makes it obvious whether it’s worth opening a new travel card or a fee‑free account before the trip.
6. Split, hide, and protect: practical security for cards and cash
Good travel banking isn’t just about which card you have. It’s about how you carry it and how you avoid money mistakes on trips.
My security setup looks like this:
- Split everything
I never keep all cards and cash in one place. I’ll carry one card and a bit of cash on me, keep another card in my day bag, and stash a backup card and emergency cash in my luggage or a hotel safe. - Decoy wallet in high‑risk areas
In pickpocket‑prone cities, I sometimes carry a cheap wallet with a little cash and expired cards. My real cards and most cash stay in a money belt or hidden pocket. - Exact or near‑exact change for transport
I try to have small bills and coins for taxis, buses, and metro cards. It reduces theno change
dance and the temptation to just wave away missing coins. - Card controls and alerts
Many banking apps let you set travel notices, freeze cards, and get instant transaction alerts. I turn on alerts for foreign transactions and ATM withdrawals so I see fraud quickly.
I also keep a simple note (paper or secure app) with:
- Last 4 digits of each card.
- Bank emergency phone numbers (international format).
- Any daily ATM limits or spending caps I’ve set.
If something goes wrong, I don’t want to be digging through old emails on a dying phone to find a number. These small travel money safety tips make a big difference when you’re stressed.

7. Build your backup plan: what if a card fails mid‑trip?
On a multi‑country trip, I assume at least one thing will go wrong: a card gets skimmed, a bank blocks a transaction, or an ATM eats my card. The goal isn’t to prevent every problem; it’s to make sure none of them end the trip.
My backup plan has layers:
- Redundant cards
As mentioned earlier, I carry multiple cards from different banks and networks. If one bank freezes my account, I switch to another. A backup credit card for travel is non‑negotiable for me. - Emergency cash buffer
That $100–$200 in home currency plus a bit of local cash buys me time to sort things out if all cards suddenly fail. - Trusted contact at home
I have someone who can help: receive a replacement card, send money via a transfer service, or call banks during their business hours if I’m in a different time zone. - Digital backup
I keep secure copies of card fronts/backs and passports in an encrypted cloud note or password manager. If I lose everything, I still have the details needed to call banks and prove my identity.
I also think through a worst‑case scenario: If I lost my wallet and phone tomorrow, how would I access money within 24 hours?
If I don’t have a clear answer, I tweak my lost card backup plan abroad until I do.
8. Put it all together: a simple checklist before you leave
To make this practical, here’s the condensed travel banking setup checklist I run through a week or two before a multi‑country trip. It keeps my managing money across multiple countries plan simple and calm.
- Cards
- 1–2 primary credit cards with no foreign transaction fees.
- 2 debit/ATM cards from different banks (ideally one with ATM fee reimbursements).
- Optional: multi‑currency prepaid/forex card if it’s cost‑effective in my country.
- Cash
- Plan to withdraw 2–3 days of local currency on arrival.
- Prepare $100–$200 equivalent in home currency as an emergency stash.
- Check cash declaration limits for all countries (including transit points).
- Fees & limits
- Confirm foreign transaction fees for each card.
- Check ATM fees and daily withdrawal limits.
- Note any cash advance fees so I know what to avoid.
- Security
- Split cards and cash into at least two locations.
- Set up transaction alerts and verify I can freeze cards via the app.
- Prepare a decoy wallet if I’m visiting high‑risk cities.
- Backup
- Write down bank emergency numbers and last 4 digits of each card.
- Store secure copies of passport and card details.
- Agree on a plan with a trusted contact at home for sending money or handling mail.
If you walk through this checklist before your trip, your money setup will be as intentional as your itinerary. You’ll still have surprises on the road—but they’re far more likely to be the good kind.